Another technomage

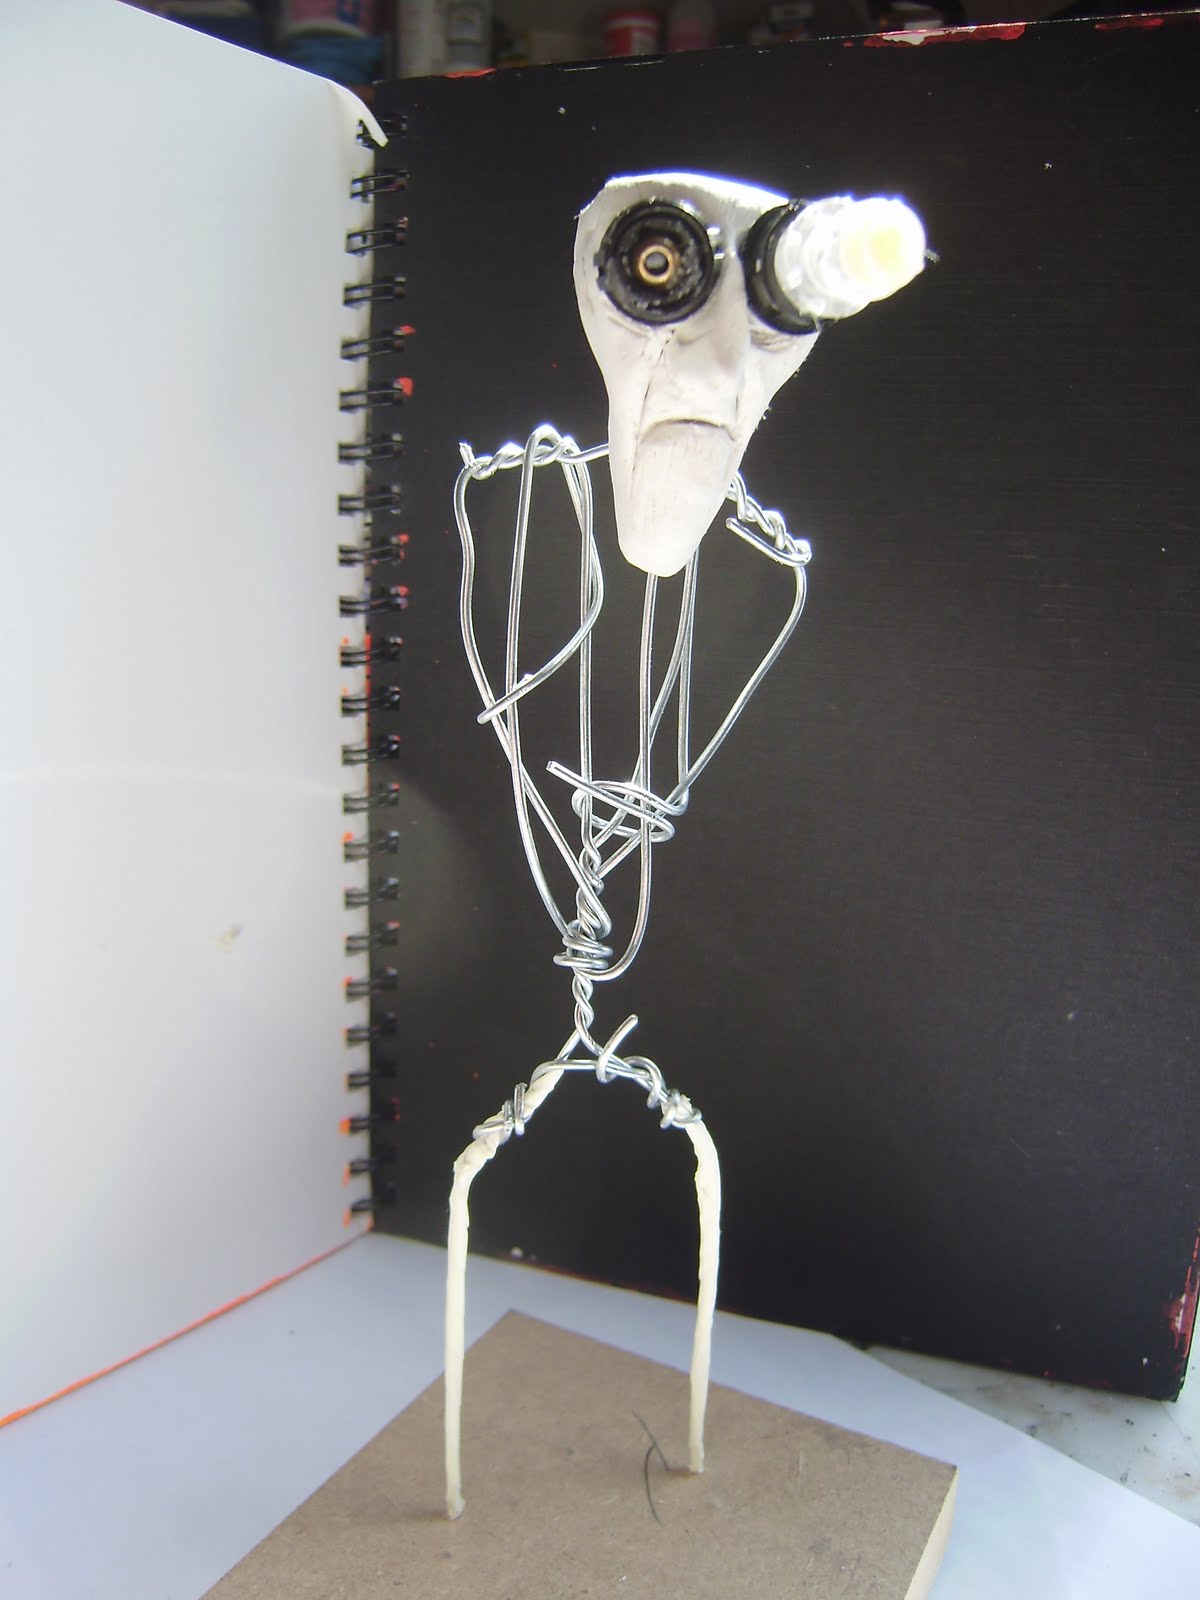
I was really pleased with my last figure The Technomage. I liked all the pipes and tubing and the bits growing from his back, as well as the result of using sculpey for the head. The next figure was an attempt to develop my sculpey sculpting skills with a mor realistic head.


He's a bit rough around the edges in places, but I like the look. The head is sculpey (white I think) stained with red and burnt umber acrylic which ahs given a pleasing flesh effect. The sculpey is slightly transparent so looks like real flesh, as long as you don't overdo the painting. Lots of staining with watered down acrylic, lightly rubbed back with a tissue and built up over time.

Because I wanted this figure to have his workings showing and he has no legs I built him around a hollow card shape.


This is the very basic shape over which I'll add the clothing. The head is on a brass rod which goes through the body and will make up part of his mechanical workings.


The front of the figure, much like the earlier figure is made of segmented body armour (a bit like a wood louse) The sections are made from thin couragated card, edged with thin wire to allow it to keep it's shape. The pieces are then covered in masking tape and a few coats of pva (this strengthens the shapes and also covers the tape joins. This is then painted/stained  with black  brown acrylic. Very little is used and is worked into the surface with a stiff brush giving a lovley finish. I've found that a good coat of glue is needed as the edges of the tape easily pick up an extra bit of paint, spoiling the effect. You can make out the corrugation of the card where the paint has picked up the subtle changes in surface texture. You can also see a larger section which will become the coat. This is made in the same way but using thick parcel paper. It's strong and flexible.


The armour segments are hot glued in place. A last piece is added over the shoulders to make up the edge of the hole in the back.


A section of tube filled with fairy liquid becomes a hose. Thick wire is pushed into the end and this is slotted into a hole in the body.

The coat/robe is made to fit over the body shape. This normally takes a few goes from newspaper before I'm happy with the fit and shape. The collar is especially tricky as you can't lie it flat. As before the shape is edged with wire, covered in tape and layers of glue before staining.


Once I'm happy this is attached to the body with hot glue.


The basic figure is now taking shape, all it needs is arms and the mechanics.

The Technomage

A few weeks ago I experimented using sculpey to model some heads, with no real idea of an outcome. Here is what the head became.


These photos are from a shoot I did using a smoke machine. I've had limited success with this as the smoke is so hard to control, it's really designed for stage work. I set up a box with holes below the sculpture and let hte smoke rise, taking loads of  shots on a rapid setting. I've done a bit of manipualtion on them but I like the result.

The Technomage (named after a set of characters from Babylon 5) was partly inspired by David Warner's Evil Being character in Time Bandits. He was a tall thin character in red robes with lots of bone like bits (see below) and an ongoing love, if that is the right word, with the wonderful Skeksis created by Brian Froud. I always thought the bug like segmented armour they wore was so cool.


Animatronic ant

I've just watched a lovely little movie called Africa United, the story of a boy DuDu and his journey to the South African World Cupwhich includes some fantastic animated scenes. The animation uses very low tech methods such as simple puppetes but in a sophisticated way. An ant, based on a simple African child's push toy caught my eye and I've attempted to recreate it's mechanism with the plan of developing my own ant creature (probably in a steampunk style).
Below is a video of the ant I've made today out of card. It's still very rough but woks well. Also a short film on the making of the puppets for Africa United.


The Ghosthunters

I had a lot of fun recently creating Professor Gogol; Demon Hunter. He was a fairly quick sculpt using some very simple shapes and structures which gave a really nice look and different to other work I've done recently. He's been sat on my shelf crying out for some backup, lets face it demon hunting is no fun without someone watching your back.
I'm keeping these guys simple, focusing on interesting body shapes and funky top hats, with detail in the goggles and their equipment.
So far each figure is on it's own base but I think they will look good as a set on a round base, all facing outwards. This will be a bit of a pain as the first two have their feet modelled onto the base so will need some fixing, but I think they will look good together.


The third figure of the group, which I've just started will be small, hunchbacked with an oversized tophat and massive thechno thingy on his back, partly to add to the character but also to give interest when viewed from behind.


Fimo. Sculpey or DAS, which to choose?

Choosing the best modelling clay for my work has always been a problem for me.
I trained as a ceramicist (fancy name for potter) and for many years sculpted in crank which is a very groggy clay (the grog is small fragments of fired clay) which is strong and easy to work in although not suited to small work. When teaching I use a basic school clay which is soft, malleable and holds its shape when being handled as well as taking detail easily.
So when I moved into mixed media work some years ago it was important to find a good modelling clay which I could work in but didn't need a kiln.
Below are some comments and experiences on the clays I've used.
DAS or plastiroc.
This is cheap (about £3 for half a kilo). I've used it for years after discovering it at school and it's a staple for GCSE and A level sculptures. It sticks to anything, can be built onto itself when dry and can be worked in reasonable detail and drys hard and white and can be sanded.
The problems are it is very soft so if you are working on a shape in your hand you can easily loose the detail. Also in small pieces it can be fragile.
2 examples below, on the first you can see tool marks yet to be sanded and on the second a slight stain to show up shape and detail on the white clay surface.


Fimo
I started using this for some work a few years back after watching a demo by Wendy Froud. The preparation she went through, chopping and blending seemed complex but the effects are stunning. I bought a few packs of a light tan colour and used it straight out of the pack.
I built heads on thick wire wrapped in tin foil, this gave a good solid skull to build on and something to hold, even so it was easy to damage detail as you held a head, and working on one area you could feel the shape moving, especially as I added small lumps to build up detail.
The end result was good and strong and an ideal colour for staining (see below). The main problem was that I found some packs very hard and almost impossible to work with, being used to soft workable material this was a pain.


Sculpey
A few people have recommended this, including the local craft store Creativity so I bought a few packs.
It is much softer than fimo and can be worked in the hands to soften it so is easier than fimo. Also you can fire it and build onto this and fire again. This was a big bonus as I like to create a skull on a rod onto which I build the head (see below) all you need is a little vaseline on the surface (this can also be used to help smooth the surface and remove finger prints).
I've tried 2 heads, one a white steampunk figure and one a troll. The first was in white sculpey and has given a lovelly opaque partchment like skinn colour, ideal for the old scientist it will become. The whit was much softer than the buff and at one point was like working in chewing gum, but I let it cool for a bit and was fine.


You can see it has taken the detail far better than the das head and has a much more interesting finish, which I may also stain to bring out the detail.

Below you can see the troll head take shape from basic skull on a rod (set in a base for ease of handling)


Once I had a skull I could use small lumps of soft clay to build ut the basic shape. The eyes are beads and survive the cooking process with no ill effect.


I sometimes left the clay to harden a bit before working in the detail.
The teeth are white sculpey fired and pushed into the soft head.


The horns below were added in white onto the fired head, you can make out the wire which was pushed into the head before firing. The horns were wrapped around this.


The final piece is about 9cm across from horn tip. I've stained it with brown acrylic.

I'm pleased with the end results and plan to explore this material again.

Professor Gogol Demon Hunter


Lost the muse?

Some time ago I was corresponding with an amazing artist called Hellgnome and we were discussing what to do when you can't seem to find inspiration. I've been trying to create a dirigible for some time with no real excitment. The idea is for a figure in  chair hanging below a blimp like device but I just can't get going on it. So with a long weekend in the studio I started to play with a few other ideas.
When stuck I usually make heads and from these a character will come to life, (failing that I clean and tidy my studio, a clean desk often helps and you sometimes find bits and pieces to stimulate ideas).
Below is the result.


I liked the head but wasn't clear on the body. I fancied a large stocky figure with a big coat, here are some ideas I played with. I need to work on the backpack a bit more, this will probably depend on what interesting bits I find.


Because the figure is mostly body I created a very simple armature on which to build him. Below you can see the figure from start to completion of basic figure. All told this took about 6 hours.