Displaying work; an internet journey.

It's been nearly a year now since I actively started using this blog and promoting my work online (with the intent of selling). Its been an interesting process. I tried a few online galleries to get going; Deviant art proved great for getting feedback and a way of drawing people to the blog. It was interesting exploring how people were directed here, and I was amazed how often I found my work promoted on other sites, always respectfully and with links here.
Two weeks ago I started a facebook page called The Professor's Steampunk Emporium. I feel the name Impsandthings doesn't really reflect the steampunk work. I found many steampunk sites on facebook and 'liked' them and posted links to my work. Again an amazingly quick response and 50 'likes' already plus a lot of extra blog traffic and more followers here.Thankyou to those of you who come back again and again and add comments, it's great to get feedback and know I'm not working in a vacuum

All this has made me realise the need for better quality photos of my work. I saw on Tom Banwell's blog (a really talented maker of steampunk masks) some time last year the advantage of quality photos to enhance the work.
My aim is to create some sets for some of my pieces, maybe add smoke and good lighting but to get the ball rolling I took some quick pics with a arker painted background. White is not good for such darkly coloured sculptures. So far this is just a piece of mdf with sponged browns and black acrylic but already I can see the improvement.


The Captain


New Directions

My last few pieces have encouraged me to explore some new directions. Firstly creating smaller detailed more human figures although with slightly styalised faces. Secondly more machine base work like the bike and this is one reason for making smaller figures as they have to become part of a bigger piece.
Having a new direction always makes me motivated so I now have two sculptures underway; an aviator who will be hanging below a dirigible/airship in a pilots seat (seats are great fun to make as I found with the bike) and the guy below.


In these photos of the early construction you can see the basic shape made up from wire card and reinforced newspaper (two layers glued together, edged with thin wire and covered in masking tape then coated in pva)
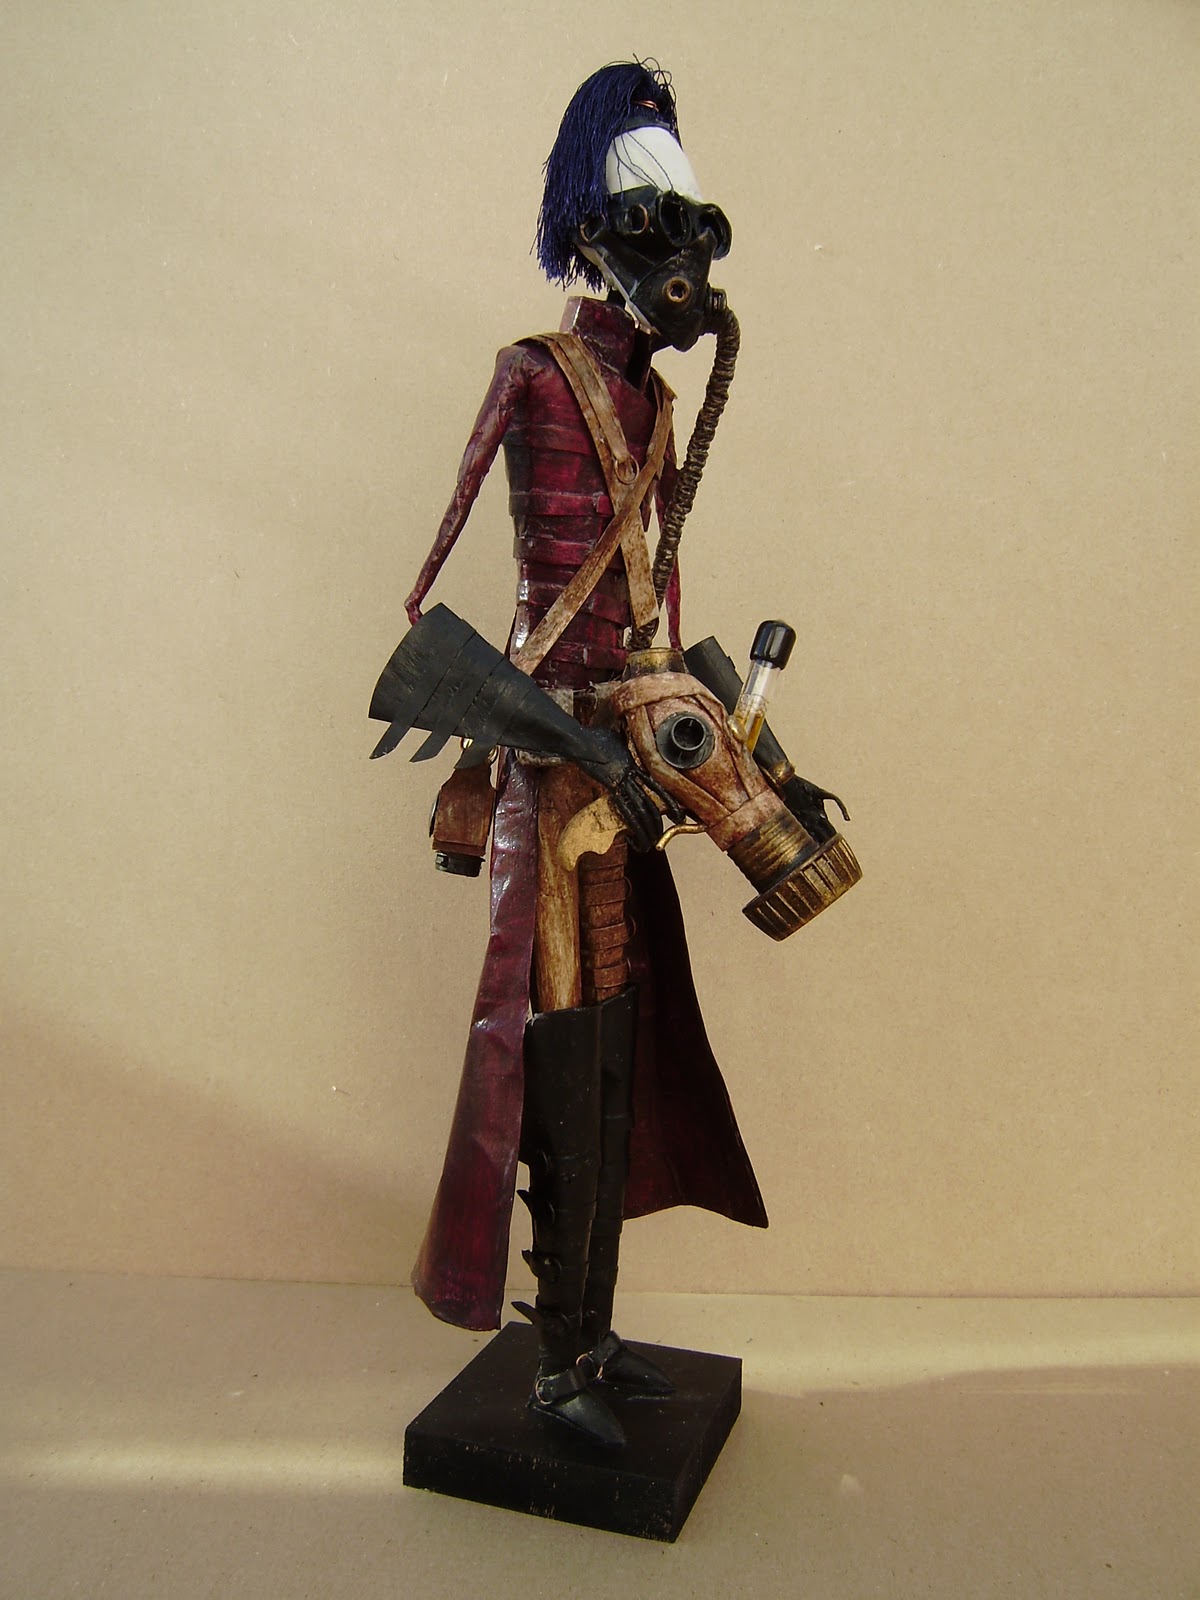
Originally he was going to be a punk with spiky hair, I found some lovely blue thread joined in tassles at the local craft store (Creativity) and imbedded them in the plasti roc head, the look I wanted was pinched from a Keith Newstead automata I love his work both his automata and the figures he adds to them. They look simple but are a result of very clever and skillful use of materials.

However as he developed he took on a new character altogether:
For some reason he has taken on more of a C18th cavalry officer look (with added straps and buckles).


I really like this type of jacket and the red was a nice change from the usual black and brown leather I go for.  Below you can see I've started to explore a breathing mask for him. He may also get a jet pack or wings or even a BFG. He needs something as he's a bit static at present.


The Joy of Sale

I've had very little success selling my work (mostly through lack of effort to be honest) but as ebay are having a listing free weekend I thought I'd list the bike:

http://cgi.ebay.co.uk/ws/eBayISAPI.dll?ViewItem&item=330535555490

I feel that the web is not the best place to sell sculpture as people really want to see up close and personal what they are buying, but this is free so worth a go. Most of my work is made purely for my own pleasure so selling is not the goal. Certainly having work seen on the internet is rewarding, I have lots of psoitive feedback on Deviantart and have found my work all over the place in online galleries, blogs, articles etc which is great. I guess the next step is to look into copyrighting.

Steam Punk SAMCRO

So here is the finished piece, of which I'm really pleased. Not sure of a title yet, anyone recognise the title here?
My next job is to create some good backdrops so I can take some suitably moody pics of my work, may even employ a smoke machine.


Steam punk bike

Now that half term is here (and the weather is suitably grey and uninviting) work on the vehicle has sped up. I have been stuck on the basic shape for awhile, partly through lack of enthusiasm but also as I couldn't figure out how the forks and handlebars should look. An old hosepipe nozzle did the trick. I've drilled it and used thick brass rods to make the handlebars with old plastic ampules for the grips. I've been using brass rod a lot lately, it is great for joining pieces together securely but I can also then deconstruct to add more bits. This is important for someone who makes stuff up as he goes along!
I've used the rods to join the 2 halves of the frame together rather than cutting mdf, it's strong and light and once you get the hang of aligning holes much easier: I just slot the bits together.
I've used it to make control levers also (with white beads for knobs)

Also I think the extra type of material adds to the overall finish.


I realised the other night that my bike needs a really cool exhaust, after rummaging through my bits box I found these sweeping curved tubes, which once sprayed looked just right. I had a bit of trouble securing them but finally slotted thick wire inside and then sank them into dowel, this was then fitted into a plastic drum. Fortunately I had drilled decorative holes into the frame (see top photo) so 2 more bits of dowel allow the whole thing to slot onto the frame securely enough to take the weight of the long exhaust.

The bike is close to finished in these photos, I just need to add foot rests, a few little bits and pieces for detail (these will come from my dwindling plastic bits box) and finish off the engine behind the seat.
This is always the fun part and sadly over too quickly.

A perfect circle

I started the weekend by trying out my idea for cutting a neat circle.
The plan was top make a jig that would allowe me to turn the mdf from which the circle is to be cut on an axis, ensuring a clean accurate cut.
I measured the circle, drilled a central hole to take a dowl and then cut another hole into a thin piece of ply which fits perfectly against the base of the band saw to hold the circle the correct distance from the blade.
I had to cut a line into the mdf to take the blade (this was at right angles to the circles diameter), once done I gently turned the mdf on the dowl and ended up with a near perfect circle.
Cutting the inner circle for the wheel was not as effective because aligning blade and curve  was difficult but now I have the principal I will get there!


Once I had the front wheel I went back to the design and made a basic chasis, with lots of reference to choppers and trikes. So far everything moves including the steering column. To keep construction simple and not spoil the lines I'm using brass rods to pin all the sections together, this proves strong and easy to take apart as I cange and add bits.

The last photo shows some bits of plastic resting in place as I try ideas for the mechanics.


Making wheels

I've been struggling for a while with making wheels. either as part of an automata or just cutiing round shapes from wood, especially for wheels. Where possible I've used found bits of plastic, which has been fine, but as I experiment more with automata this is not always enough. When I started thinking about my latest project, a steampunk racing car, I knew I'd need to come up with a practical solution.
There are various options:
You can buy circle cutters for pillar drills which are fine for small circles and cogs. they are relatively cheap and some are adjustable.
For larger circles, such as the wheels of the car I'm making, I need something else.

Below you can see various wheels I've made today:
First some plastic bits I had lying around; either too small or just not the right look.


Secondly I tried cutting a shape from MDF, lots of careful measuring and drilling holes, but still not what I wanted. However I did realise when doing this that having the wood on an axis allows for a smoother and more accurate cut. Initially I held the wood by hand and rotated it applying pressure to the centre. Better than before but not perfect. My next job is to rig some kind of clamp to my saw that allows me to do this. I figure if I have a dowl spindle in the centre of the circle I'm cutting and attach this to a clamped arm I will have a reusable tool for cutting circles.(we shall see)


The final wheel was again hand cut but with brass spokes added. Again careful measuring was needed to mark the spoke position.
A dowl (which doubles as the wheel's axel) was added to the mdf circle and by clamping the wheel I was able to cut  a series of vertical holes for the brass rods.
I then cut out the inner shapes (this meant the wheel rim has a slit in but this doesn't really show) and repeated the process. You can see the first attempt split in half.

The end product, lacking some spokes looks just right.
The circles are not perfect, needing some sanding but are far better than previous attempts.


Steam punk racer

I'm still enjoying making mechanical contraptions as part of my figures. While making The Professor in his walking chair I played around with the angle he was sat, or in one case reclined, which gave me the idea of a steampunk sports car. I haven't decided on the style yet (sleak and curved or more along the line s of early Victorian steam cars) but it will ahve lots of moving parts behind the figure.
The plan is to make a static version and then recreate it as an automata.

So far I've made the basic figure (a close copy of The Professor) from a wire armature covered in folded newspaper and card for shape/bulk.


In the second photo you can see where simple card shapes have been added to the armature with masking tape to create the basic jacket. The figure has just been covered in PVA to keep the masking tape from peeling off and create a smoother surface. I've found that building up layers of tape and glue gives a better finish than covering with a layer of tissue which tends to hide detail and wrinkle.


Below you can see straps and buckles drying ready to add to the coat. The straps are cut from a double sheet of newspaper (glued together before cutting) and then wraped in a piece of tape for strength and thickness. A brass ring is being held in place while the glue dries. Holes will be added with a spike and a small piece of brass threaded through to create a buckle. The back looks messy but when glued to the figure looks fine.


More bits to be added, you can just make out straps for goggles and 2 pieces for the coat, made in the same way as the straps but with thin wire all around the edges. The result is very strong and flexible, far better than the sculpted card in ealier figures.


The chair clamped toghether while drying.


Finally a couple of pics I found while searching for ideas