girocopter part 4: details

Once I've finished the basic structure I start to play with all the surfaces and details which create the steampunk look: lots of wooden surfaces, brass, tubes and stuff, mostly made from found objects or lengths of brass and beads.

Below: two shots of the foot rest. Originally intended to be  a flat piece of wood this looked wrong, all the bits of brass rod used to hold all the bits togehter looked much better, so I added a few more. Eventually all the ends will have small brass beads added.


Every machine needs an engine.I don't worry about making something that actually is functional just interesting. Plastic vials filled with fairy liquid held in place by brass rods, which will be cut to size and given knobs. The vials will have a plastic tube coming out of the top going into the engine.

Surfaces are created with masking tape strips to represent wood and stained with a mix of burnt umber and black acrylic. Only a small amount is added, no water, and rubbed into the surface, then wiped back with tissue to bring out surface texture.


I've kept the figure fairly simple with a big collar.


The goggles are made from beads set in modellers water which sets clear.


Girocopter part 3: wings

Having not made wings before I had to try a few techniques to get a suitable effect that was sturdy but light. Below is the process used to make the tail section, The rotors were made in exactly the same way.

I used a card template to work out size and shape.

A wire skeleton was cut to shape for the ribs

Wide masking tape was layered carefully over the wire ribs. 

The wing was turned over and a layer of tape added to this side, care was take to push the tape over and around the wire as it was applied. This was done with a rounded wooden tool and meant the tape was flush with the wire.

A coat of pva was added to give the wing strength.

The tape was then cut down to shape, a bit like a bat wing.

Here you can see the rotor blades, same technique but thinner with more ribs. The main wire arm of the rotor extended well beyond the tape so it could slot into a brass fixing.

The finsihed tail sections. I added small brass knobs for finish  and a hooped tube to the very top through which the brass control rod slotted.


Girocopter part 2: the frame

When I startedt this piece I only had a very vague idea of what it would look like: a chair in front of a boiler with 2 rocket pods on either side. I had a couple of plastic bottles ideal for the pods, so I started with a simple cross of mdf that would slot together to create the chasis. You can see two circles of mdf added to the cross piece so that the bottles can be slotted on. I've found out to my cost that when you don't have a clear plan, which I never do, it's useful to be able to dismantle the pieces so you can drill holes etc. later on so each piece is either held in place by brass pins or slots together.
The piece of dowel will have the boiler and blades added to it. You cna see holes drilled in it so the boiler can be pinned securely in place.


A simple chair made from thin mdf was added next, again pinned but with 2 longer pins which will slot into the figure and hold him in place.


Below you can see the rocket pods, made from a bottle cut in half and covered in strips of masking tape to give a wood effect, the ends are plugged with dowel to allow a propellor to be fitted.

They are slottted onto the mdf cross oiece and secured with 2 brass rods, these were an after thought and both gave strength and improved the look, but involved a complete dismantle to allow the holes to be drilled.


The boiler was made from a few bits of bottle and plastic I had in my scrapbox. They are all pinned to the central dowel . I've also added wheels and a support rod.


With te figure added and the tail fins in place I now have a good idea of the final look. It needs lots more brass bits and tubes etc though.


Girocopter part 1

I'm now working on rehashing an old unfinished piece. I had palnned to make a figure sat in a chair below a dirigible, powered by 2 propellers. This is now going to be a girocopter, similar in design to the gironaut. My aim is to use lots of brass struts to give intersting surfaces as well as capture the feel of old fashioned cloth and wood planes which used lots of cables to keep the wings rigid. See this photo of the boxkite plane in Bristol museum


Over the next week or so I'm going to document as much of the making process as possible, starting here with the initial sketches of the copter and engine bits.


This design is pretty much what I'd already made, showing addition of controls and tubing etc.


Trying to work out ow the wings and flaps will fit to frame.


Ideas for some bits and pieces to add to the engine. I also considered alternate ways of designing the seat/cockpit, from very deep bucket seats with lots of consoles to the simple upright one I've gone with.


At one point I thought of having the figure on a bike.


The Gironaut

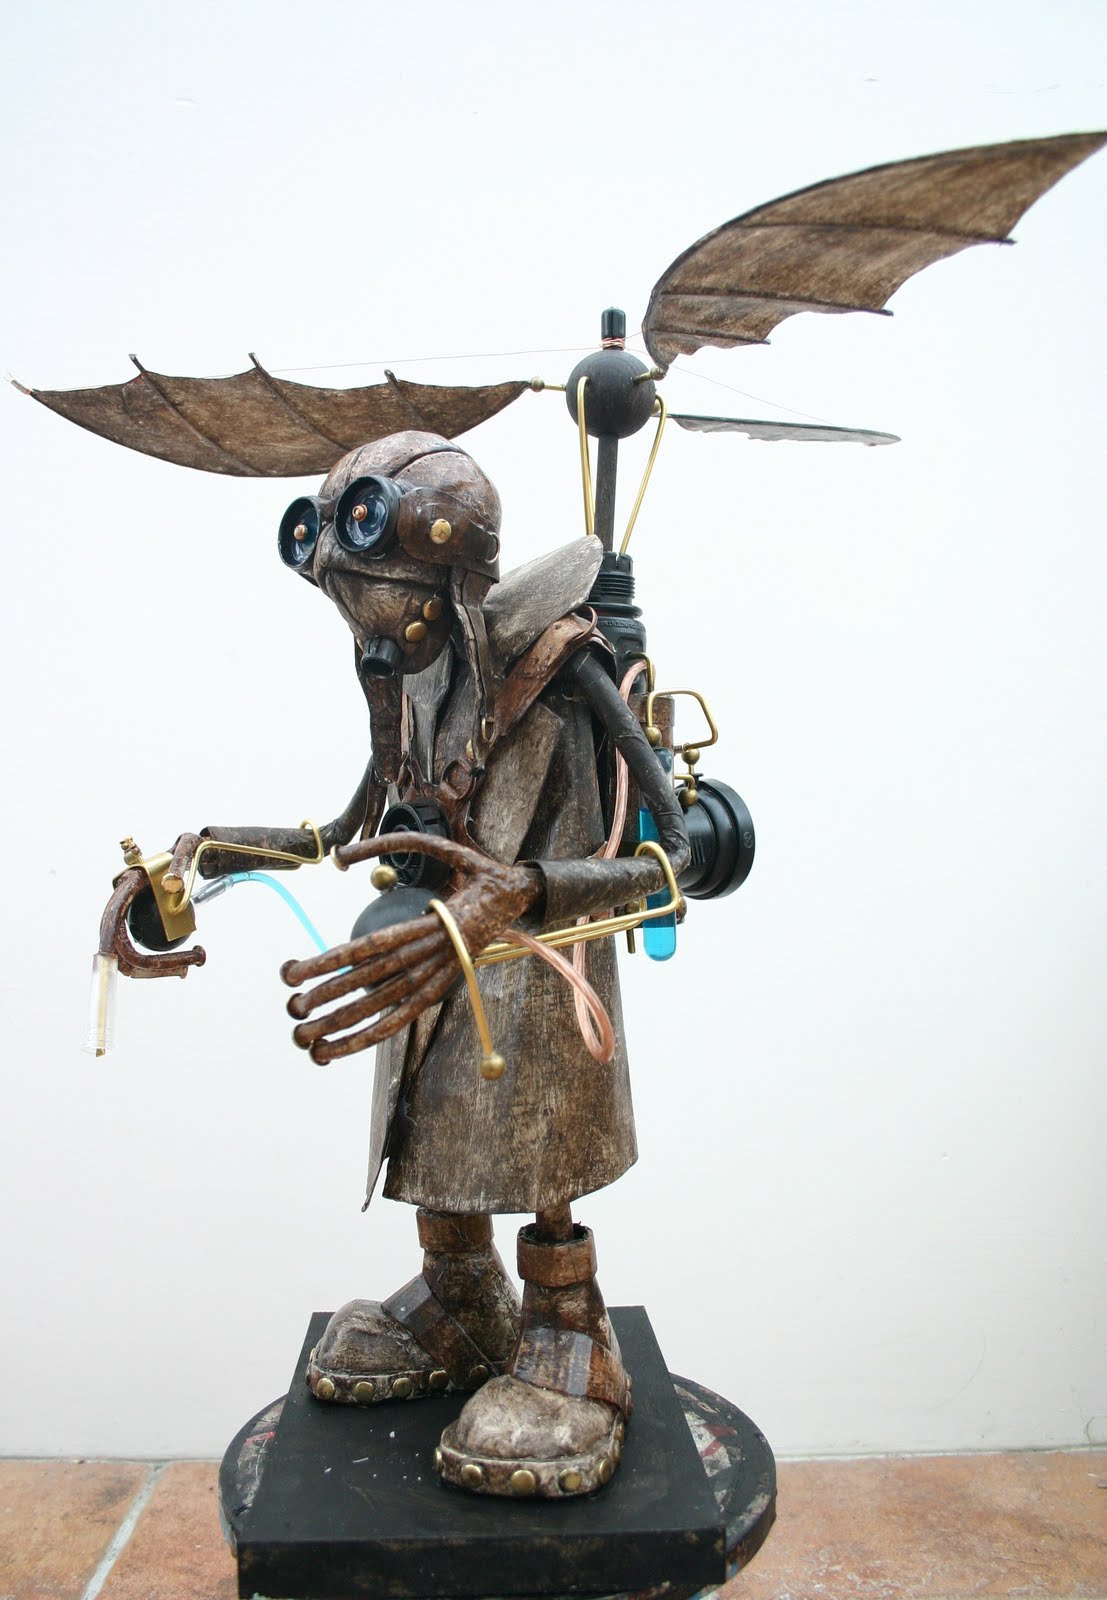
I've not been very creative over the last few months and this guy was an attempt to make something, anything. I had no real aim when I started so just made a basic head, a pair of goggles and leather flying hat. I often find that making a basic shape helps me get going, especvially if I can find some good bits and pieces for goggles or respirators.  From there he evolved and along the way sprouted wings. I've tried a few new things, firstly using a substance called realistic water to create a glassy look to the goggles. It's used by modellers to create water, you pour it in and it sets clear. Also more detail using brass tube and sheet for things like the giro's hand control.

He's a bit derivative (9 and Stephane Halleux) as I looked around for inspiration but after a frustrating start was fun to make.
You can see the effect of the 'realistic water' fairly well here. I discovered this in a local hobbyshop and thought I'd give it a go as I run out of all the little black palstic bits I've been using for goggles so far. The liquid took about 18hours to set enough not to move so the figure had to be supported so the eyes were on the level while drying. The little brass beads in the centre work well and overall I like the difference in surface finish to the rest of the piece.

Where possible I'm trying to use as many brass bits as possible as this adds to the range of colours and surfaces.You can just make out the split pins used for the ends of the gloves and in other places. In many cases these are used to secure bits of the sculpture together, as in the centre of the harness.


The giropack is made up of found bits of plastic and bits of brass rod and splitpins are used both as decoration and to join the bits together. This is stronger than glue and also allows for dismantling when I need to add other bits.


I struggled for some time with the hand controls, originally I wanted to rigid arm rests coming out of the backpack, but I couldn't get them to look right with the materials I had. In the end I opted for bent brass rods which wrap around the figures arms and then slot into the hand controls. I think these look much better than my original idea plus are really easy to secure to the hands. The odd shaped finger coming from the hand was  inteded to slot into the original control pad design, as a result looks a bit odd. I like the idea though for future pieces.


As I continue making steampunk figures it is clear that use of brass bits or other found objects is much better than trying to fake materials. I guess the next step should be making real leather coats (or maybe straps to start) and then learning to cut and solder brass!

flying things

It's been a while since I've created anything,  partly through lack of inspiration but mostly because the weather has been too nice to be inside, so all I've done is fiddle around with a few ideas. None of these were really going anywhere but a few days of rain has provided time and motivation so I now have a few projects taking shape.
Here are some photos of where I am now.

This first guy was originally going to be  a puppet but he was looking too much like a character from the movie 9 so I made him static and added a coat.

I thought he would look good with some kind of jetpack, which has since evolved into a helipack which you can see below in an early stage, made up from bits and pieces.


The second figure has been hanging around for about 6 months and was originally going to be part of a dirigible. I liekd the idea of a helicopter so as with the guy above stuck some bits together to make an engine and added blades.


Finally a head I made a few months back when first playing with sculpey. He  now has a body and will be a thin one legged old man with a crutch and tall stovepipe hat, perhaps a bit Faginish.