Choosing the best modelling clay for my work has always been a problem for me.
I trained as a ceramicist (fancy name for potter) and for many years sculpted in crank which is a very groggy clay (the grog is small fragments of fired clay) which is strong and easy to work in although not suited to small work. When teaching I use a basic school clay which is soft, malleable and holds its shape when being handled as well as taking detail easily.
So when I moved into mixed media work some years ago it was important to find a good modelling clay which I could work in but didn't need a kiln.
Below are some comments and experiences on the clays I've used.
DAS or plastiroc.
This is cheap (about £3 for half a kilo). I've used it for years after discovering it at school and it's a staple for GCSE and A level sculptures. It sticks to anything, can be built onto itself when dry and can be worked in reasonable detail and drys hard and white and can be sanded.
The problems are it is very soft so if you are working on a shape in your hand you can easily loose the detail. Also in small pieces it can be fragile.
2 examples below, on the first you can see tool marks yet to be sanded and on the second a slight stain to show up shape and detail on the white clay surface.


Fimo
I started using this for some work a few years back after watching a demo by Wendy Froud. The preparation she went through, chopping and blending seemed complex but the effects are stunning. I bought a few packs of a light tan colour and used it straight out of the pack.
I built heads on thick wire wrapped in tin foil, this gave a good solid skull to build on and something to hold, even so it was easy to damage detail as you held a head, and working on one area you could feel the shape moving, especially as I added small lumps to build up detail.
The end result was good and strong and an ideal colour for staining (see below). The main problem was that I found some packs very hard and almost impossible to work with, being used to soft workable material this was a pain.
Sculpey
A few people have recommended this, including the local craft store Creativity so I bought a few packs.
It is much softer than fimo and can be worked in the hands to soften it so is easier than fimo. Also you can fire it and build onto this and fire again. This was a big bonus as I like to create a skull on a rod onto which I build the head (see below) all you need is a little vaseline on the surface (this can also be used to help smooth the surface and remove finger prints).
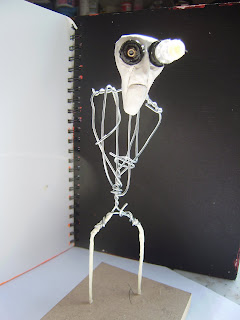
I've tried 2 heads, one a white steampunk figure and one a troll. The first was in white sculpey and has given a lovelly opaque partchment like skinn colour, ideal for the old scientist it will become. The whit was much softer than the buff and at one point was like working in chewing gum, but I let it cool for a bit and was fine.

You can see it has taken the detail far better than the das head and has a much more interesting finish, which I may also stain to bring out the detail.
Below you can see the troll head take shape from basic skull on a rod (set in a base for ease of handling)
Once I had a skull I could use small lumps of soft clay to build ut the basic shape. The eyes are beads and survive the cooking process with no ill effect.
I sometimes left the clay to harden a bit before working in the detail.
The teeth are white sculpey fired and pushed into the soft head.
The horns below were added in white onto the fired head, you can make out the wire which was pushed into the head before firing. The horns were wrapped around this.
The final piece is about 9cm across from horn tip. I've stained it with brown acrylic.
I'm pleased with the end results and plan to explore this material again.


